Twitter has a strict file size limit for videos, and nothing is more frustrating than getting the “file too large” error right before uploading. The good news? You can compress your Twitter videos without sacrificing quality. With the right tools and settings, your video stays sharp, loads faster, and meets Twitter’s requirements. In this guide, we’ll show you the simplest ways to compress Twitter videos while keeping them looking professional.
Why compress your Twitter videos
Upload Faster, Get More Views
Large video files take forever to upload and often fail on slow internet connections. Compressed videos solve this problem by uploading much faster and working better for everyone.
Here’s the difference: a big 512 MB file takes about 7 minutes to upload, while a compressed 50 MB file uploads in only 40 seconds. When your videos upload faster, more people will actually watch them instead of scrolling past while they’re still loading.
Better Quality for Mobile Viewers
Most people watch Twitter videos on their phones, often on slower 3G or 4G connections. Before compression, an 8 Mbps bitrate creates huge files that buffer constantly. After compression at 2-4 Mbps, you get smooth playback on most phones while maintaining good quality.
The best approach is using MP4 format with H.264 video and AAC audio. This combination works on almost every device and keeps your video looking crisp at 720p quality.
Save Money and Storage Space
Storage costs add up quickly when you’re creating video content regularly. Consider this: 100 one-minute 4K videos take up about 100 GB of storage, but the same videos compressed only need 1 GB of storage. That’s a 100x difference, giving you more space on your phone, faster backups, and lower cloud storage costs.Bandwidth costs matter just as much. When 100,000 people view a 100 MB video, you’re transferring 10 TB of data. The same number of views for a 10 MB compressed video only transfers 1 TB. For content creators and small businesses, this can mean the difference between affordable and expensive video sharing.
You can refer: free cloud storage options for videos
How To Compress Twitter Videos

| Step | What to do |
|---|---|
| 1. Load | Open your compressor, click “+ Video” and add the source file (MP4, MOV, MKV, etc.). |
| 2. Choose format | Select MP4 (H.264) with AAC audio for maximum Twitter compatibility; consider HEVC only if you control playback devices. |
| 3. Trim & resize | Cut dead space, downscale 4K→1080p or 720p, and set frame rate to 30 fps (or keep source if already 30 fps). |
| 4. Set bitrate/CRF | Use CRF 18–23 or VBR with target/maximum bitrates (see recommendations below); enable two-pass for complex scenes. |
| 5. Export | Choose an output folder and hit RUN; verify final size and quick-play on a phone before tweeting. |
Selecting the Right Video Format

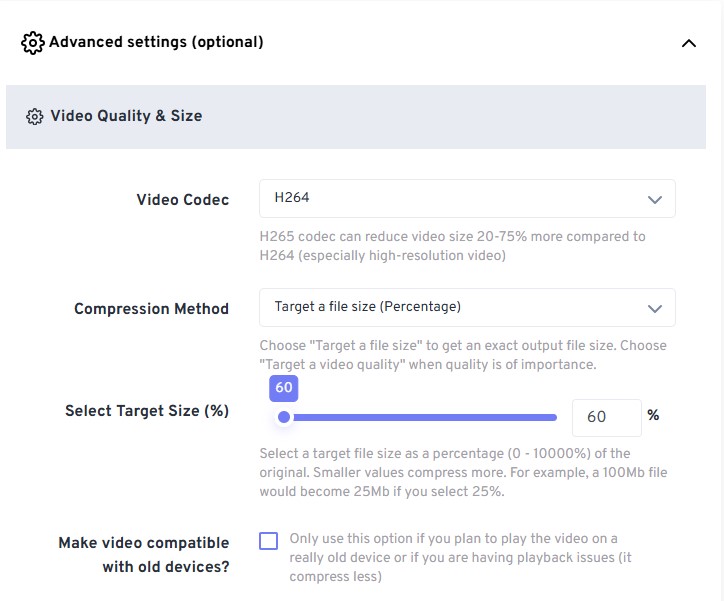
You should default to MP4 container with H.264 (x264) video and AAC-LC audio for the broadest compatibility on Twitter; that pairing avoids transcoding on upload and tends to preserve quality. HEVC (H.265) can reduce file size by roughly 30–50% versus H.264 at similar perceived quality, but many upload paths and older devices still prefer H.264, so only use HEVC if you confirm supported playback end-to-end.
For web-native experiments, VP9/WebM offers good compression for static-screen content, but uploading WebM to Twitter can trigger additional server-side transcoding. Keep audio at 128 kbps AAC for voice/video balance; stereo at 44.1–48 kHz is standard and keeps audio clarity without bloating the file.
Adjusting Resolution and Frame Rate
Downscale 4K sources to 1080p (1920×1080) or 720p (1280×720) to cut file size dramatically—4K→1080p typically reduces bitstream by ~4× with minimal perceived loss on phones. Pick 1080p for detailed footage where text or fine detail matters; pick 720p for general social sharing where faster uploads and smaller sizes matter. Common aspect ratios (16:9, 1:1, 9:16) work well on Twitter; crop only if composition demands it.
Lower frame rate reduces bitrate needs: convert 60 fps footage to 30 fps to halve frame count and reduce bitrate requirements, especially effective for interview or talking-head clips. Fast-action sports or game footage benefit from keeping 60 fps, but you should raise bitrate limits accordingly—expect to need 1.5–2× more bitrate at 60 fps to avoid motion artifacts.
Example workflow: take a 4K 60 fps, 60-second clip encoded at ~200 Mbps and export it as 1080p 30 fps at 4–6 Mbps; that change often yields a final file under 30–50 MB with still-sharp motion and clearer detail on mobile screens.
Learn more about: How to trim, crop, subtitle Twitter videos
Utilizing Bitrate Settings for Optimal Quality
Choose between CRF (quality-based) and VBR/CBR (bitrate-based) depending on control needs: use CRF 18–23 for visually lossless to near-transparent results—CRF 18 is very high quality, CRF 22–23 visibly smaller but still good for social. For bitrate targets, set 720p at roughly 1.5–3 Mbps (1500–3000 kbps) and 1080p at 4–6 Mbps (4000–6000 kbps); raise by 1–2 Mbps for high-motion content. Set an audio bitrate at 96–128 kbps AAC to keep audio faithful without large overhead.
Enable a two-pass VBR encode if you need predictable file sizes while retaining detail in complex scenes; set a max bitrate about 1.5–2× your average target to handle transient peaks without clipping. If your encoder offers hardware acceleration, test both hardware and software x264/x265 outputs—hardware is faster but sometimes slightly less efficient.
For precise control, use CRF 20 with a max bitrate cap (for example, max 6 Mbps on 1080p) and one-pass VBR for speed, or run two-pass VBR with target 4 Mbps and max 8 Mbps to squeeze extra quality into a predictable upload size.
Top Tools for Compressing Twitter Videos
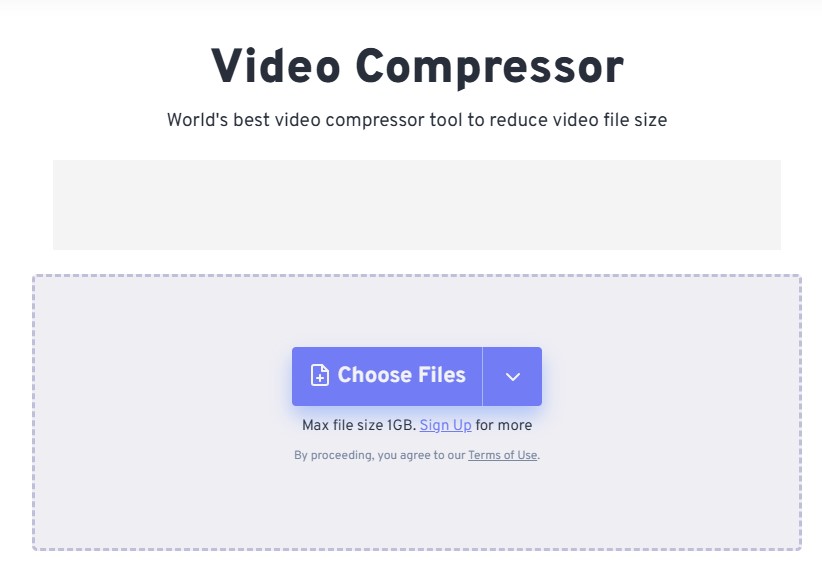
Desktop apps give you the finest control: you can set CRF, target bitrate, frame rate, resolution, and batch-process multiple clips so you meet Twitter’s 512 MB upload cap and the 2m20s (140s) length limit without guessing.
- Winxvideo AI (HQ Engine + GPU acceleration) can shrink a 1 GB 4K clip down to the low tens of megabytes while preserving perceived quality,
- HandBrake delivers reliable H.264 presets and CRF-based encoding (CRF 18–23 is a common quality range)
- FFmpeg/Adobe Media Encoder let you script or automate exact export settings for repeatable results.
Online tools work fast for one-off fixes:
- Online-Convert provides Twitter-specific presets (HD 25p/30p, 320×180, 340×360)
- Freeconvert
- MP4Compress handles automatic MP4 shrinking up to 500 MB with zero configuration
- Flixier gives up to 2 GB imports and advanced controls (CRF, bitrate) but limits free exports to 720p and to 10 minutes/month.
Expect upload/download times and privacy trade-offs; use online compressors for convenience and small-to-medium files rather than heavy batch jobs.
Common Mistakes to Avoid When Compressing Videos
Don’t Cut Bitrate Too Aggressively
The biggest mistake is reducing bitrate without considering your video’s resolution and settings. If you take a 4K video at 25 Mbps and drop it straight down to 2 Mbps, you’ll get blocky, pixelated results that look terrible on any screen. Instead, reduce the resolution first, then adjust the bitrate accordingly.
Twitter works best with MP4 files using H.264 compression. Avoid converting your video multiple times through different programs because each conversion degrades the quality further. Do it right once rather than fixing problems later.
Fix Resolution and Format Issues Before Upload
Twitter doesn’t handle unusual video formats well. The platform strips out HDR colors and might reject videos with weird aspect ratios. Convert your 4K videos down to 1080p or 720p before uploading, and make sure HDR footage is converted to standard colors.
A simple change from 4K at 60fps down to 1080p at 30fps can reduce your file size by 60-80% while still looking great on phones. Remember Twitter’s limits: files must be under 512 MB and regular accounts can only upload videos up to 2 minutes and 20 seconds long. Trim unnecessary parts instead of over-compressing everything.
How to Keep Your Videos Looking Sharp
For most Twitter videos, use these settings as a starting point. Choose MP4 format with H.264 compression and set the quality level between 18-23 (lower numbers mean higher quality). For 1080p videos, aim for 5-8 Mbps bitrate, and for 720p videos use 3-5 Mbps.
The secret to better compression is taking more time during the encoding process. If your software has speed settings, choose “slower” options. This takes longer but produces much better results with smaller file sizes and sharper details.
When downsizing videos, think strategically. Converting 4K footage at 60fps down to 1080p at 30fps maintains visual clarity while cutting file size by 50-70%. Always check how your final video looks on both your phone and computer before posting.
Getting Audio Right
Audio settings are easy to overlook, but they affect both file size and viewer engagement. For most Twitter videos, use AAC audio at 128 kbps in stereo with either 44.1 kHz or 48 kHz sample rate. If your video is mostly talking, you can reduce this to 64-96 kbps in mono to save space without hurting clarity.
Keep your audio and video settings consistent to avoid sync problems later. If you’re editing in software that defaults to 48 kHz, stick with that throughout your process.
Compression can make your audio sound quieter or create a “pumping” effect. Aim for audio levels around -14 to -16 LUFS to match other content on social platforms. If your original recording has background noise like traffic or room echo, clean it up before compressing.
For practical settings, use AAC at 128 kbps, 48 kHz, stereo, and enable audio normalization to -14 LUFS. Apply light noise reduction if needed. For very short clips or animated graphics, removing audio entirely can save significant space and help you stay under Twitter’s 512 MB limit.
Summing up
So you can compress Twitter videos without losing perceptible quality by choosing MP4 (H.264), trimming unnecessary length, and using efficient encoders that let you lower bitrate, resolution, or frame rate only as much as needed. Use tools with GPU acceleration and quality-preserving algorithms (for example Winxvideo AI) to balance file size and visual fidelity, and preview short exports to confirm the result before finalizing.
When you opt for online compressors like ONLINE-CONVERT, MP4COMPRESS, or Flixier, pick the one that fits your needs for control, upload limits, and privacy; for maximum control and best results choose a desktop solution. Save presets, keep reasonable audio settings, and test a few export profiles so your future Twitter uploads stay within the 512MB limit while maintaining the look you want.

